Did you know the piezoelectric effect was never discovered, per se? Its existence was deduced by brothers Jacques and Pierre Curie based on their experimental observations of something called the pyroelectric effect and their extensive knowledge of crystallography. Yes, you read that right, pyroelectrics came first! After they figured out that piezo had to be there too, they devised experiments to measure the charge induced by squeezing a slab of quartz, which was very difficult at the time! For more on the history of piezo materials, you can read my What is A Piezo? post.
So what is the pyroelectric effect?
The pyroelectric effect is the tendency of piezoelectric materials to generate a charge when their temperature changes. It has nothing to do with externally applied stress or stretching that you hear about. This is strictly a thermal effect and to see it, you just need to make a momentary electrical connection to the electrodes of a piezo.
In this post, I'll demonstrate how you can test the pyroelectric effect of piezoelectric materials yourself with a voltmeter and a little plate of piezoelectric material.
- Pyroelectric Effect Video Tutorial
- Preparation for Testing on Piezoelectric Material
- Conducting Your Test on Piezoelectric Materials
- Safety Tips for Working with Piezos
- Conclusion
Pyroelectric Effect Video Tutorial
This post is based on a series we do called Tip Tuesday where we explore piezo applications and tips to help you better use and understand piezoelectric materials. Check out our video tutorials page for more. And if you have an idea for a tip, please don't hesitate to leave a comment on this post or contact us directly.

Preparation for Testing on Piezoelectric Materials
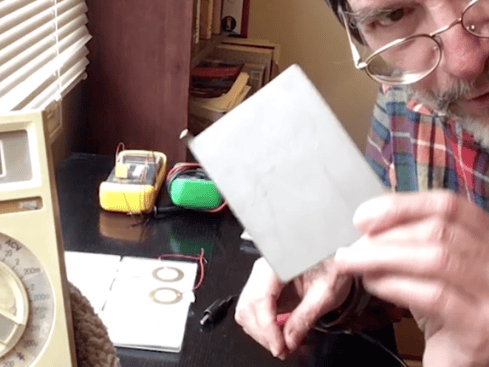
For this kind of testing where you're looking for stored up electric charge on piezos, it really helps to make yourself a little metal plate. It is a hard, stiff, flat, conductive work surface. When you place any piezo part on the plate it makes electrical contact to the "down" side electrode leaving you free to access the "up" side electrode with a single probe. It is a handy thing to have around the laboratory, and is useful for many other things like measuring capacitances of piezo parts, holding them while soldering, and so on.
Conducting Your Test on Piezoelectric Materials
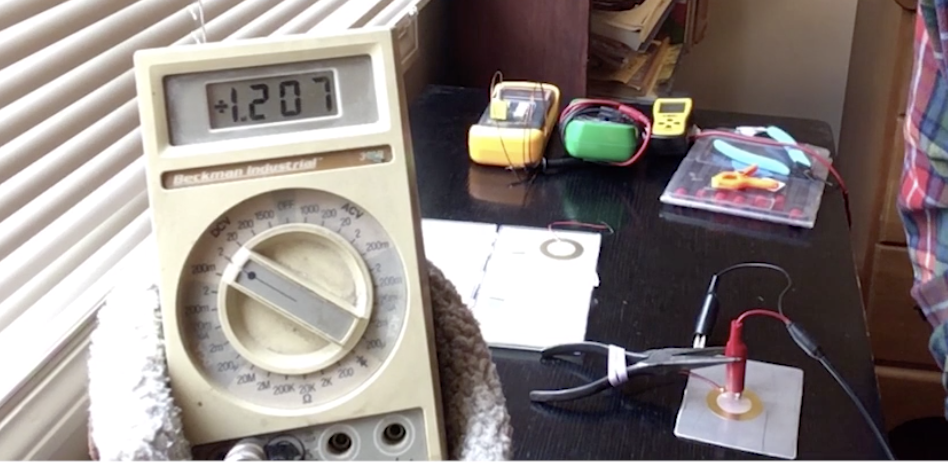
Now, take any little piezo slab and just drop it on the plate. That makes one connection. Then, clip lead the plate to the "common" input terminal on the voltmeter. Now, connect the other clip lead to the "input" terminal of the voltmeter, hold the free end in your hand, and very carefully touch the electrode surface.

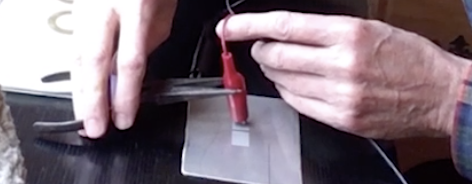
Even if you hold it as still as you can, you can see on the meter that the voltage is bouncing all over the place. We cannot quite separate the thermal signal out of the vibration signal that comes along with human touch. You can get around that with an improvised third hand made with a pair of pliers and a rubber band. Simply "tweeze" the clip lead in the needle nose and prop it (very gently!) on the piezo electrode surface. This way the contact force is quite constant, and you will see the voltage reading settle down to zero with no more vibration contribution. The stage is now set to observe the pyroelectrically generated voltage.
 Next, you'll set the digital voltmeter on the two volts scale. Take a hot soldering iron or any other source of heat and bring it close to the piezo, maybe an inch away. When you do this, you can see the voltage reading jump right up. Take the hot iron away and the voltage will drop back down.
The piezo is quite responsive to temperature changes. Did you notice that the sign of the voltage was positive? What happens when we turn the piezo over? After the voltage settles in, you will notice the signal is negative. You can use this in the lab to make sure you know what the polarity of the piezo is.
Sometimes when you buy piezo parts there will be a little distinguishing mark on one side. At Piezo.com, we use a red or green stripe, or you might see a little black dot, or even a "plus" sign that tells you that that side is plus. However, if you just get something cheap off the internet, you might not know and if you do need to know, you can put it down and use this test.
You probably noticed that if you bring the hot iron close to the piezo and just hold it there that there is an initial steep rise of voltage but it drops off to nothing in a few seconds. Then when you take the iron away, there is another big voltage shift of the opposite sign. Piezo parts are really capacitors, not batteries. When the iron induces a rise in their temperature, a charge arises in response. If there is a resistor bridging one electrode to the other (in this case the 10 megohms of the meter), it bleeds that charge off. The piezo sits there a.) discharged to zero, and b.) at a higher temperature. So, when the hot iron is withdrawn, the piezo cools down suddenly and charge of the opposite sign arises. Then that bleeds down to zero and the piezo returns to room temperature.
What if the metal plate is colder than the piezo was in storage? When the piezo is placed on the plate, and you place the probe, note the voltage. It will be huge! Why? The plate is cold and the piezo was not so cold, so the charge arose because of the shift to colder temperature, no hot iron required! If you start with the cold metal plate out of a freezer, you can observe some large voltages. Just as with the iron, the pyroelectrically induced voltages will bleed off to zero.
Safety Tip for Working with Piezos
As a practical matter when you are building circuitry that either picks up a piezo sensor’s signal, or which drives the piezo into motion, always protect the circuit from high voltages that originate pyroelectrically from the piezo. When the lab or environment temperature shifts 10 or 20 degrees, even a thin layer of piezoceramic 0.25 mm (.010 inch) thick can develop enough voltage to ruin an operational amplifier or integrated circuit that is wired directly to it. If you happen to be experimenting with thicker piezo plates or disks, say 4-5 millimeters thick, remember when you come into the lab in the morning that the piezo might have dropped in temperature overnight, and with no bleeder resistor to bleed off the charge, it can retain the capacity to give you a good "bite" when you pick it up. It can hold a charge like that for days. Therefore, I call pyroelectricity the "dark side" of piezoelectric. Make a habit of shorting out the piezo plates before you handle them.
You can check out some of my piezo safety tips on our video tutorial page.
Conclusion
So that's your overview of pyroelectrics. I hope you'll be able to use this in your explorations. For more, don't forget to subscribe to our blog and also check out our video tutorial page for more piezo tips. And, if you have any questions please get in touch with us at Piezo.com.
Related Posts:
